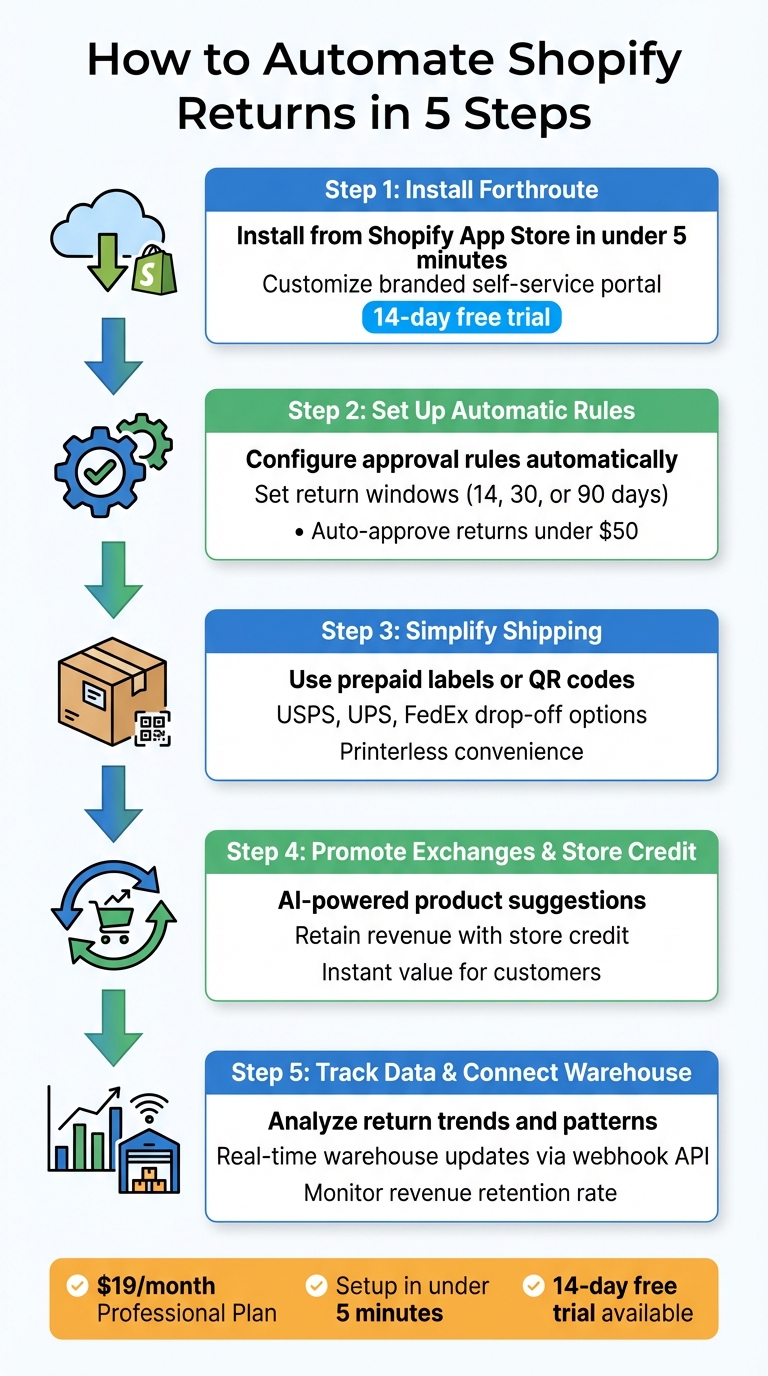
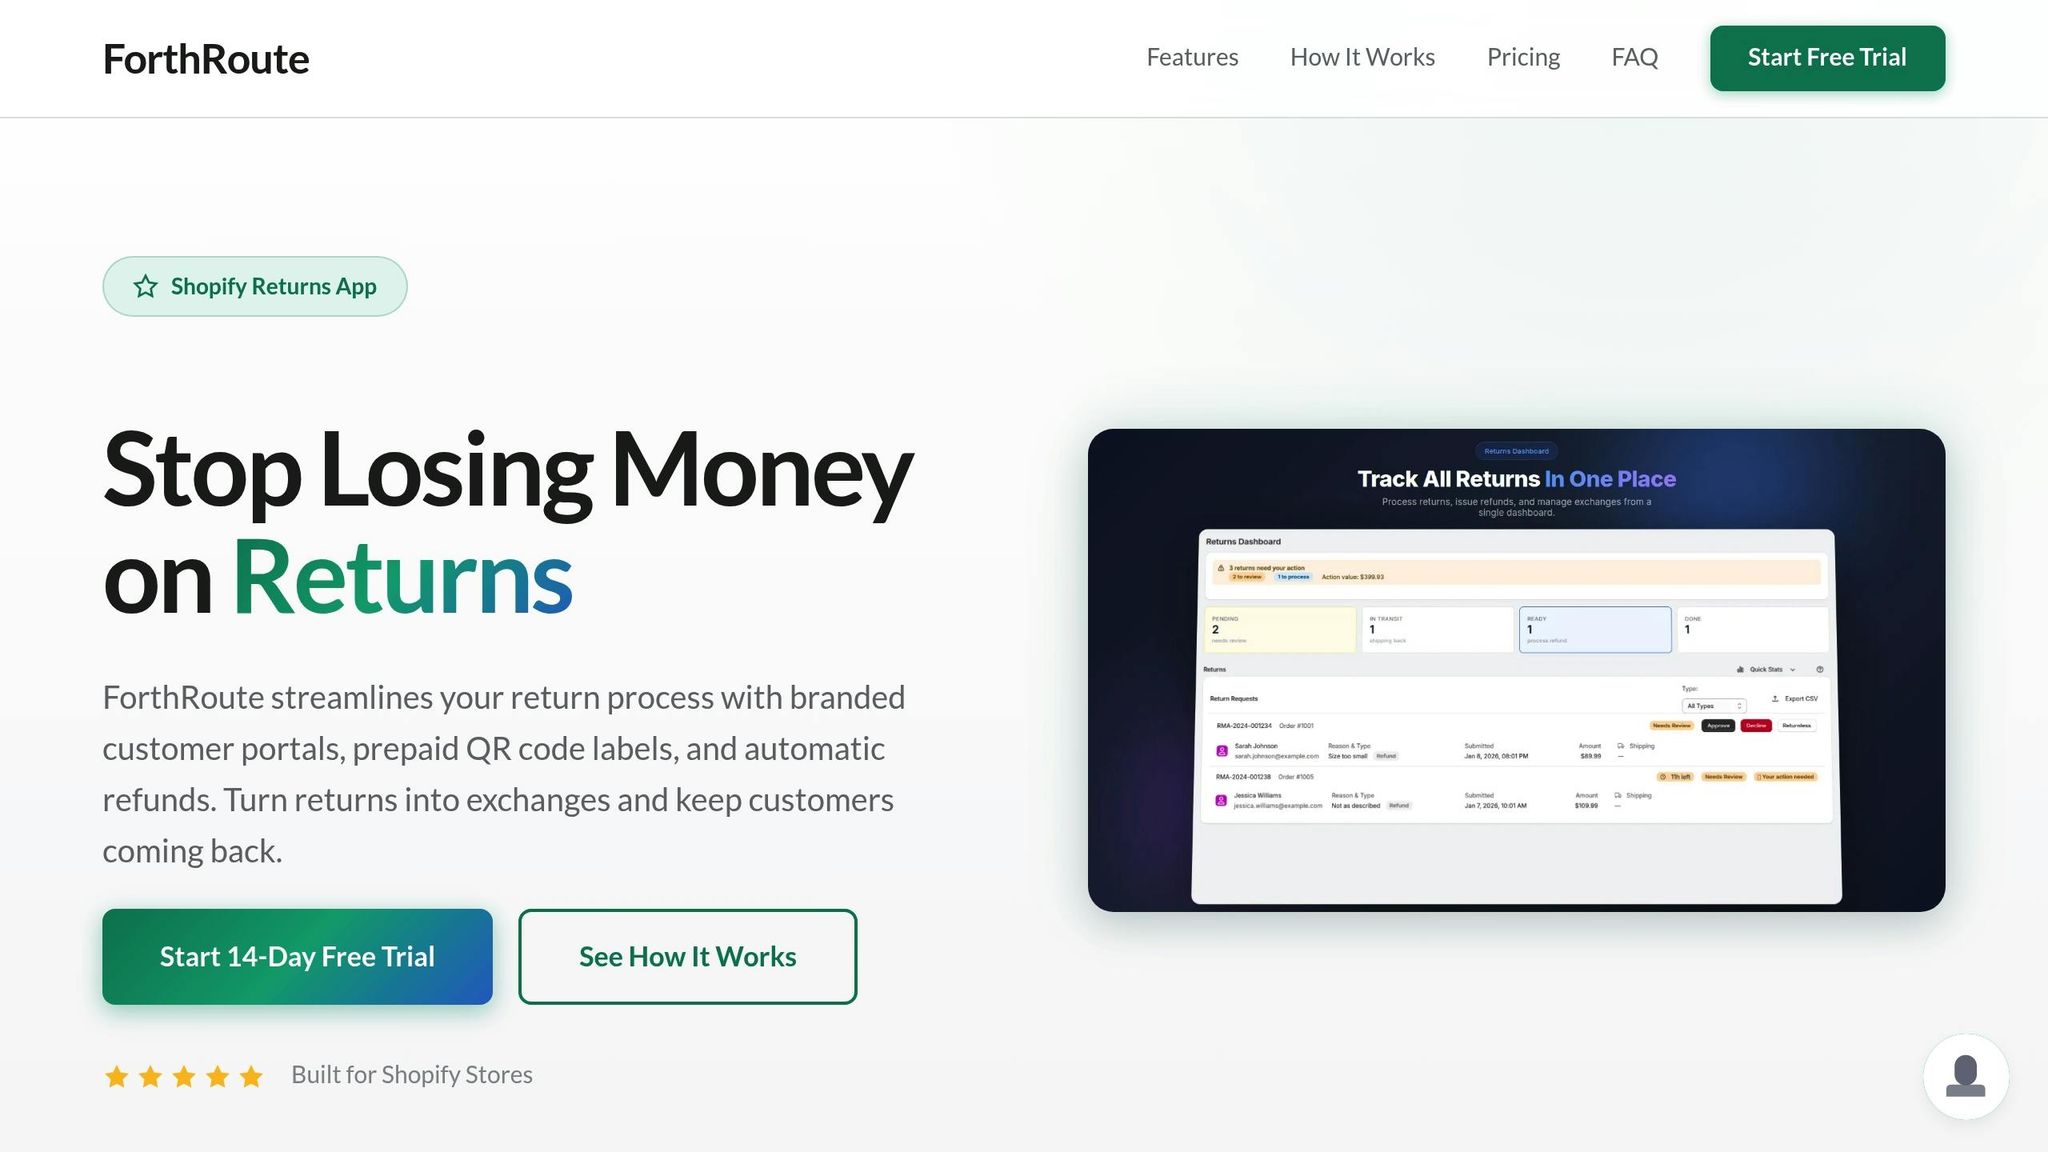
Handling returns manually is time-consuming, frustrating for customers, and often leads to lost revenue. Automating your Shopify returns process can save time, reduce errors, and encourage exchanges or store credit instead of refunds. Here's how you can do it in five simple steps:
- Install Forthroute: Add the app from the Shopify App Store in under five minutes. Customize a branded self-service portal so customers can start returns easily.
- Set Up Automatic Rules: Configure approval rules for returns based on value, product type, or return window. Automate decisions to save your team time.
- Simplify Shipping: Use prepaid labels or QR code returns for printerless convenience. Customers can drop off packages at USPS, UPS, or FedEx locations hassle-free.
- Promote Exchanges and Store Credit: Use AI to suggest alternative products or offer store credit to retain revenue.
- Track Data and Link Your Warehouse: Analyze return trends and connect your warehouse for real-time updates, faster restocking, and accurate inventory.
With Forthroute’s $19/month plan, you can automate returns, improve customer satisfaction, and protect your revenue. Setup is quick, and a 14-day free trial lets you test the system risk-free.
5 Steps to Automate Shopify Returns with Forthroute
Step 1: Install and Configure Forthroute
Add Forthroute to Your Shopify Store

Head over to the Shopify App Store, search for Forthroute, and click Install. The setup is quick and straightforward - just authorize with a single click, and you’re done in under five minutes. No coding skills needed! Forthroute is compatible with every Shopify plan, whether you’re on Basic, Shopify, Advanced, or Plus. You can try it out with a 14-day free trial - no credit card required. If it’s a good fit, you can upgrade to the $19/month Professional plan. Once installed, the app allows you to integrate seamlessly with your store's branding.
Brand Your Self-Service Portal
With the app installed, it’s time to make the self-service portal match your store’s identity. Start by uploading your logo, choosing your brand’s colors, and tailoring the messaging to fit your tone - whether you want it to feel formal, casual, or sleek and minimalist. After that, use the one-click integration tool to add a "Start a Return" link to your website’s footer menu. This ensures customers can easily locate support options. The entire process takes just a few minutes, and once complete, your automated returns workflow is ready to go live.
Step 2: Set Up Automatic Approval Rules
Create Smart Approval Rules
Once your portal is activated, it's time to set up automated rules for handling return requests. Head to the Automated Rules section in your Forthroute dashboard. Here, you can configure your return policy just once, and the system will automatically apply it to all incoming requests.
Start by defining your return window - the period customers have to initiate a return after their order is delivered. Common choices are 14, 30, or 90 days. The countdown usually begins on the delivery date, but if delivery data isn’t available, the system defaults to the fulfillment date plus a transit buffer. Next, identify products that are not eligible for returns, such as final-sale items, perishables, custom goods, or deeply discounted products. These items will be excluded from the portal, so customers can only see eligible products, reducing the chance of invalid requests. Additionally, you can create value-based rules, such as automatically approving returns under $50. This is especially useful for low-value items where the cost of processing might outweigh the product’s value.
With these rules in place, the system takes over, streamlining the approval process without the need for constant oversight.
Reduce Manual Review Work
By automating approvals, you can eliminate the delays caused by manual reviews. When a return request aligns with your rules, Forthroute instantly generates a prepaid shipping label or QR code - there’s no need for your support team to intervene. Customers get faster responses, and your staff avoids spending time on routine approvals. The system also integrates with your 3PL or warehouse management system, alerting your fulfillment center whenever an approved return is on its way. For requests that don’t meet your criteria - like those for final-sale items or returns outside the allowed window - the system automatically declines them and provides the customer with a clear explanation. This allows your team to focus on handling unique or complex cases instead of routine tasks.
Step 3: Set Up Shipping Labels and QR Code Returns
Once you've automated return approvals, it's time to simplify the shipping process. Integrated label generation and QR code returns can make this step hassle-free for both you and your customers.
Connect EasyPost for Prepaid Labels
Forthroute works with EasyPost to instantly create prepaid shipping labels as soon as a return is approved. It supports major carriers like USPS, UPS, and FedEx, giving customers multiple drop-off options. When a customer submits a return request through your portal, the system generates the label automatically - no manual work required.
To manage shipping costs, head to Shopify's Settings > Policies > Return rules. You can choose whether to:
- Offer free return shipping
- Deduct a flat fee from refunds
- Require customers to purchase their own labels
These settings will only apply to future orders. The cost structure is simple: you'll pay the carrier's standard rate plus a $1.50 transaction fee per label. Importantly, you're only charged if the customer actually uses the label.
Enable QR Code Returns
Take convenience a step further by enabling QR code returns, which remove the need for customers to print labels.
With QR code returns, customers receive a QR code on their smartphone once their return is approved. They just need to bring their package to a USPS, UPS, or FedEx drop-off location, show the QR code, and the carrier will print the label for them. Setting this up takes less than five minutes and doesn't add any extra fees beyond the standard label costs. This feature gives customers the freedom to pick the drop-off location that's most convenient for them.
Step 4: Encourage Exchanges and Store Credit
Exchanges and store credit are great ways to keep revenue within your business while addressing customer needs. Here's how you can make these options more appealing than standard refunds.
Guide Customers Toward Exchanges
Forthroute’s portal makes exchanges easy and appealing by showing customers alternative options as soon as they start a return. With just a few clicks, they can choose a different size, color, or even a related product - solving their issue while keeping the sale intact.
Another effective tactic is prioritizing store credit over refunds. Forthroute highlights how offering store credit provides instant value to customers. Instead of waiting for a refund to process, customers can use their credit immediately, giving them a reason to stay engaged with your store while ensuring the revenue remains in your business.
Use AI to Suggest Alternative Products
AI can take the exchange process to the next level by offering personalized product suggestions based on why a customer is making a return. Forthroute’s system automatically recommends alternatives tailored to specific return reasons. For instance, if a customer returns a shirt because it’s "too small", the platform might suggest the next size up.
These AI-powered recommendations not only simplify the exchange process but also create a more customized experience for the customer. You can set up and adjust this feature through the Forthroute dashboard to match your inventory and business needs, turning potential refunds into seamless exchanges.
sbb-itb-a3e286c
Step 5: Track Data and Connect Your Warehouse
Tracking returns data and linking your warehouse can turn your returns process into a real advantage for your business.
Analyze Return Patterns and Costs
Forthroute’s analytics dashboard helps you uncover return trends and pinpoint reasons. For instance, in apparel, common reasons like "Too big" or "Too small" can reveal sizing issues early on. With these insights, you can adjust inventory strategies and cut down on unnecessary expenses.
One key metric to monitor is your revenue retention rate - how often customers opt for exchanges or store credit instead of refunds. This directly reflects how well your returns workflow is keeping revenue within your business. Additionally, track shipping label costs, which include the carrier's rate plus a $1.50 fee per label. Understanding these logistics costs can help you find areas to streamline.
You can also use this data to improve your product pages. For example, if a specific item is frequently returned for being "too small", update the size guide or add a note suggesting customers order a size up. These simple, data-driven updates can make a big difference in reducing future returns. By syncing this information with your warehouse, you ensure prompt action on returns.
Notify Your Warehouse of Incoming Returns
Connecting your warehouse or third-party logistics (3PL) provider ensures returned items are processed and restocked quickly. Forthroute offers a webhook API that sends real-time updates to your warehouse management system at every stage of the return - when it’s initiated, received, inspected, and restocked. This seamless communication helps avoid delays and keeps your inventory accurate.
With Forthroute’s webhook integration (included in the $19/month Professional Plan), your warehouse gets instant notifications when a return begins, allowing them to prepare for incoming items. Once the returned product arrives and passes inspection, the warehouse can send an update back through the system, which automatically adjusts inventory in Shopify. This closed-loop system ensures products are restocked and available for purchase faster, helping you avoid stock shortages and keep customers satisfied. By minimizing delays, this integration also boosts revenue retention and streamlines your operations.
Test Your Returns Workflow Before Launch
Testing your returns process is essential to ensure it delivers fast, accurate customer service while protecting your revenue. Before going live, take the time to confirm every part of the system works as intended.
Run Test Returns
Start by creating a test order in your Shopify admin. Set the order status to "Fulfilled" or "Partially Fulfilled" - returns can only be initiated for orders with these statuses. Use the footer return link and sign in with the test order's email address. You should receive a six-digit verification code via email.
Walk through the entire customer journey: select an item, choose a return reason like "Too big", and pick a resolution - refund, exchange, or store credit. Make sure the system blocks "Final Sale" items and any returns that fall outside your allowed window, whether it’s 14, 30, or 90 days. Double-check that any applicable fees are displayed correctly.
Test the functionality for prepaid shipping labels and QR codes. For printerless returns, ensure the QR code appears clearly on mobile devices, as customers will need to show it at carrier drop-off points. Review the three automated emails (confirmation, approval with label, and decline) to confirm they’re branded properly and include all the right details.
Once you’ve verified every return action, move on to the final pre-launch steps.
Complete Your Pre-Launch Checklist
Simulate different scenarios to make sure the workflow handles everything smoothly. For example, test orders that include both regular and final-sale items, exchanges for a different size, and store credit resolutions. Also, check that the return portal’s design - logo, colors, and fonts - matches the branding of your Shopify checkout page.
Ensure your team receives notifications when a new return request is submitted. If you’re working with a warehouse or a third-party logistics provider (3PL), test the webhook integration to confirm real-time updates are triggered when returns are received or inspected. Verify that the return portal link in your footer, refund policy, and order status pages redirects customers to the correct customer accounts login page, not an outdated one.
Lastly, remember that any updates to your return rules will only apply to orders placed after the changes are saved. Use fresh test orders to confirm everything is configured properly.
Conclusion
Using Forthroute to automate your Shopify returns makes the entire process smoother, protects your revenue, and keeps your customers happy. With setup taking less than 5 minutes, you can create smart approval rules once and let the system handle everything from there.
The self-service branded portal is a game-changer, giving customers the ability to manage their returns on their own. This not only improves convenience but also cuts down on the number of support tickets your team has to handle. Features like QR code returns and automated exchange suggestions add even more ease while helping retain more revenue.
On the backend, Forthroute integrates seamlessly with your warehouse through webhook APIs, ensuring your fulfillment team is instantly updated when returns are received and inspected. Plus, the analytics dashboard provides a clear overview of return trends and costs, giving you the insights needed to make smarter inventory decisions.
All of this is available for just $19/month with a 14-day free trial. Shipping labels are only charged when used, keeping your expenses straightforward and manageable.
FAQs
How does Forthroute enhance the return process for customers?
Forthroute simplifies returns with a branded self-service portal that lets customers initiate returns, download shipping labels, or choose exchanges effortlessly. This streamlined approach cuts down on wait times and reduces the need for manual assistance.
Features like instant exchange recommendations and printerless returns using QR codes make the process even smoother, ensuring a more convenient experience that boosts customer satisfaction and encourages loyalty.
How do QR code returns make the process easier for customers?
QR code returns make the process of sending back items incredibly simple. Instead of dealing with the hassle of printing a shipping label, customers can just head to a carrier drop-off location with their package. All they need to do is show the QR code on their phone, and the carrier handles the rest, including printing the label.
This streamlined approach not only saves time but also cuts down on effort, creating a smoother and more pleasant return experience for customers.
How does tracking return data improve inventory management?
Tracking return data plays a key role in improving inventory management. It sheds light on why items are being returned and helps identify recurring patterns. This kind of insight enables merchants to tackle common problems, such as product defects or sizing issues, and make smarter choices about stock levels, product adjustments, or even supplier agreements.
When return data is integrated with inventory systems, stock levels can be updated automatically as returns are processed. This reduces the chances of overselling or running out of stock. Plus, automating these updates cuts down on manual errors, boosts efficiency, and ensures inventory records stay accurate. In the long run, leveraging return data effectively supports better product planning, lowers storage costs, and enhances customer satisfaction by ensuring products are consistently available.